Using a projector as a tool for painting
When working with a projector it is a great help to have an image already separated into the number of colours that is convenient to work with.
see Splitting an image in Photoshop.
That can be done using Photoshops Save for Web option with its GIF generator. I will describe how to use that in another instruction.
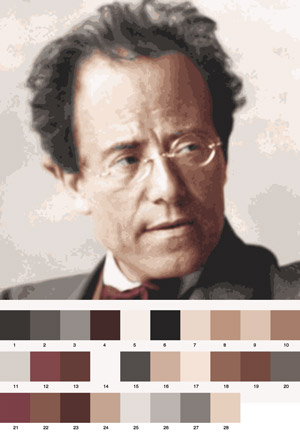
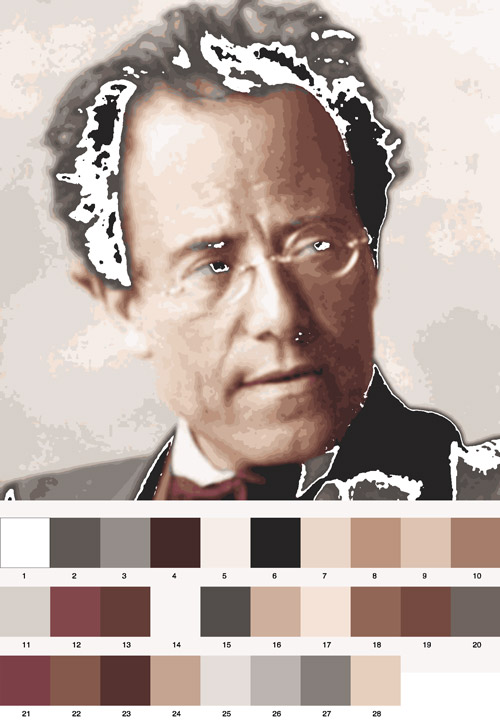
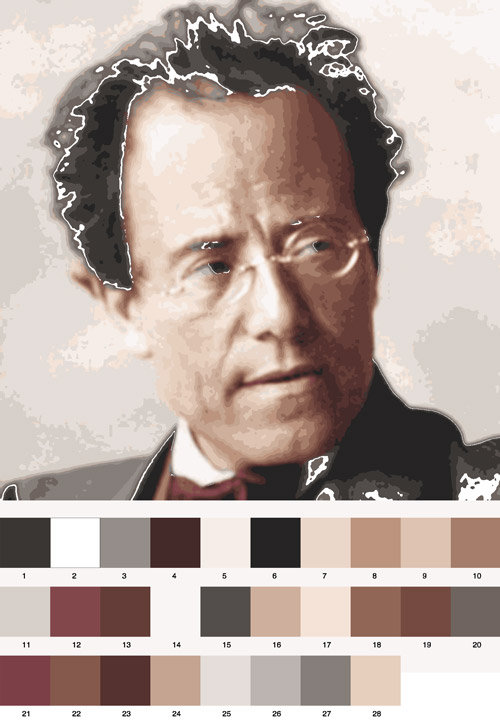
As you can see I have made a palet with all the colors beneath the image. Each color has a number to write on the paint palet so you know which color you are working with.
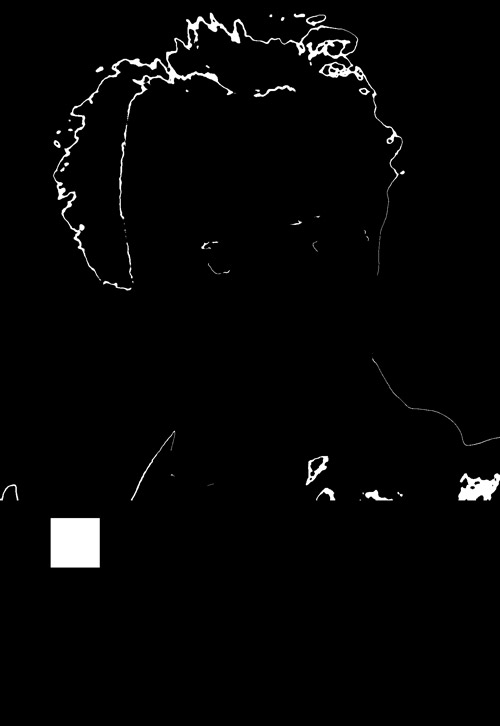
I have made a layer in the Photoshop document for each color so one layer only have one color in it. To be able to see the layers more clearly I have changed the color to white on all the layers.
You make a layer for one color by creating an empty layer on top of the image layer. With the empty layer selected you choose the paint bucket tool with "all layers" set to on and "contiguous" set to off and paste white (or whatever color you would like) into the color you like to separate.It sounds a lot more complicated than it is. Don't try to understand it just try to follow my instructions step by step and later you will see that all you need are there.
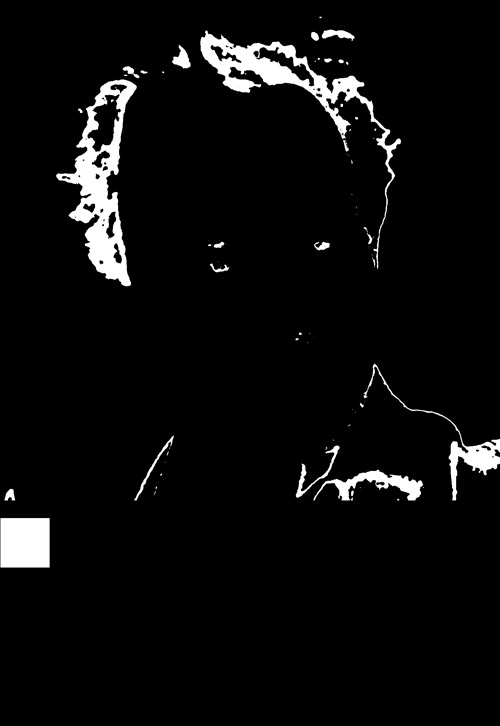
I have inserted a black layer between the image and the separated color layers so I only have one white layer on a black background when projecting.
You can download my Photoshop document by clicking HERE and use that as an example.
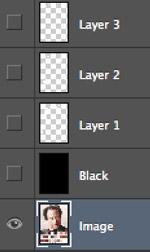
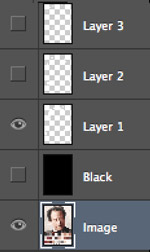
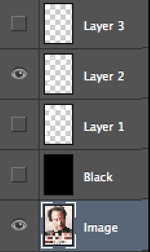
Layer 1 opened.
Layer 1 and the black layer open.
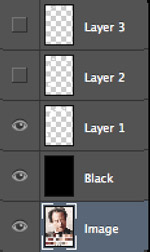
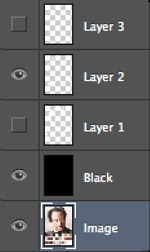
Layer 2 opened and layer 1 closed.
Layer 2 and the black layer open.
With this technique it is easy to see where to put the paint even on a canvas with something else painted on it. And you can work with the room lights on and still see everything clearly.
Submit questions here